This page guides you through setting up an NVG router and connecting devices to your WiFi 6 network. If you’re a new customer with a scheduled installation, our technician will set up your Ziply Fiber router during the installation appointment. For a list of technical specifications for fiber routers, go here
Connect your NVG fiber router

- After unpacking your installation kit, find the sticker on your new router with the WiFi Network Name and Password. For easy access, consider writing this down or taking a picture of it. (You’ll need it later to connect your phones, computers and other devices to WiFi.)
- For best WiFi coverage, place the router in a central location that's also near an ethernet wall outlet.
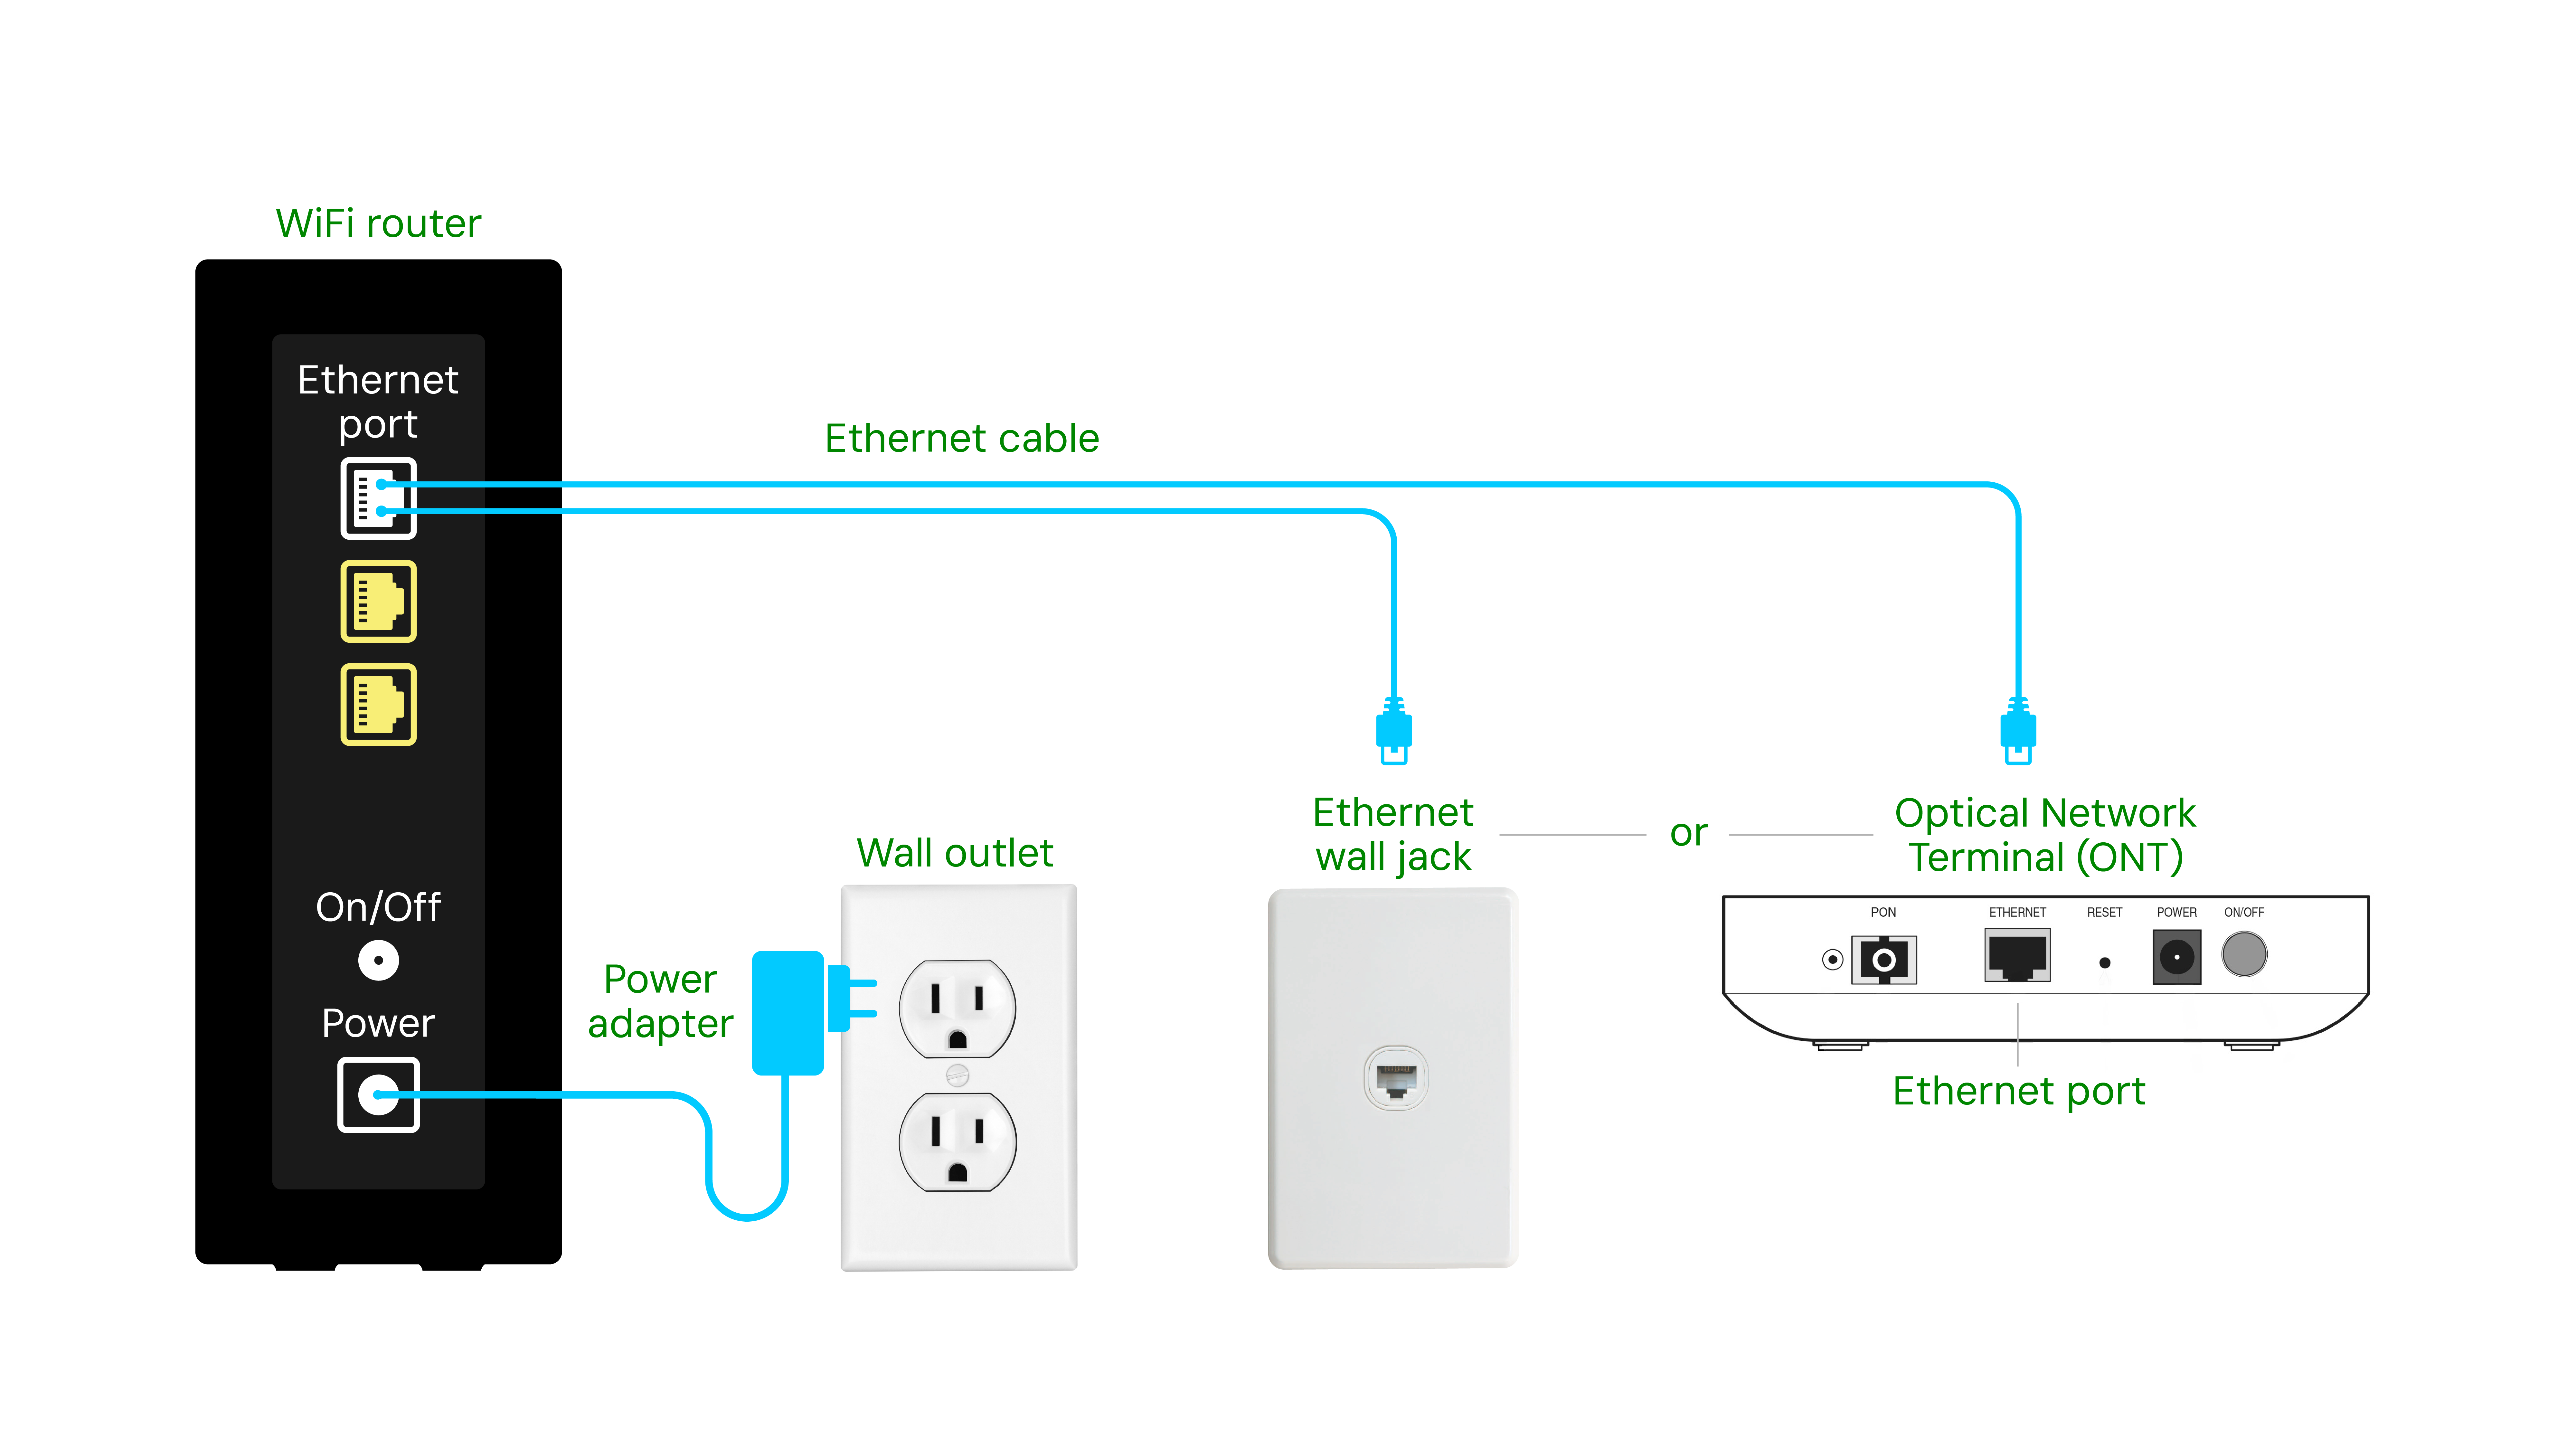
If you’re also connecting TV equipment, connect your internet router first, placing it next to or nearby your primary TV and set-top box. - Connect the power cord to the Power port on the back of your router. It’s usually the last port towards the bottom of the device. Plug the other end into an electrical outlet.
- For NVG fiber routers, connect the Ethernet cable to the first port under Ethernet.
- Press the power button to turn on your router.
- Lights on the front of your router will blink while the device comes online. This may take a few minutes. When the light for the WiFi symbol
turns solid green, you can begin connecting devices to the internet.
- In most cases you'll start by opening the settings menu on your device.
- Find the WiFi or network menu. If WiFi is not enabled, choose the option to turn it on.
- In the list of available wireless networks, choose your Ziply Fiber home network.
- Enter the network password. If you haven't changed your home network's name or password, you'll find both printed on a sticker on your Ziply Fiber router.
Connecting devices to your WiFi network
You can connect any WiFi-capable device to your Ziply Fiber wireless network.
Settings and menu options are different depending on a device’s make, model and operating system. Refer to manufacturers’ instructions for finding a wireless signal and connecting to it from your smartphone, computer, tablet, gaming console, or other device.
After connecting, if a device exits your WiFi range and then returns, it will likely automatically reconnect to your network unless there's a change to the network password or name.
